Create Custom Domain
This guide will help you set up a custom domain for your paywall. The process consists of five simple steps.
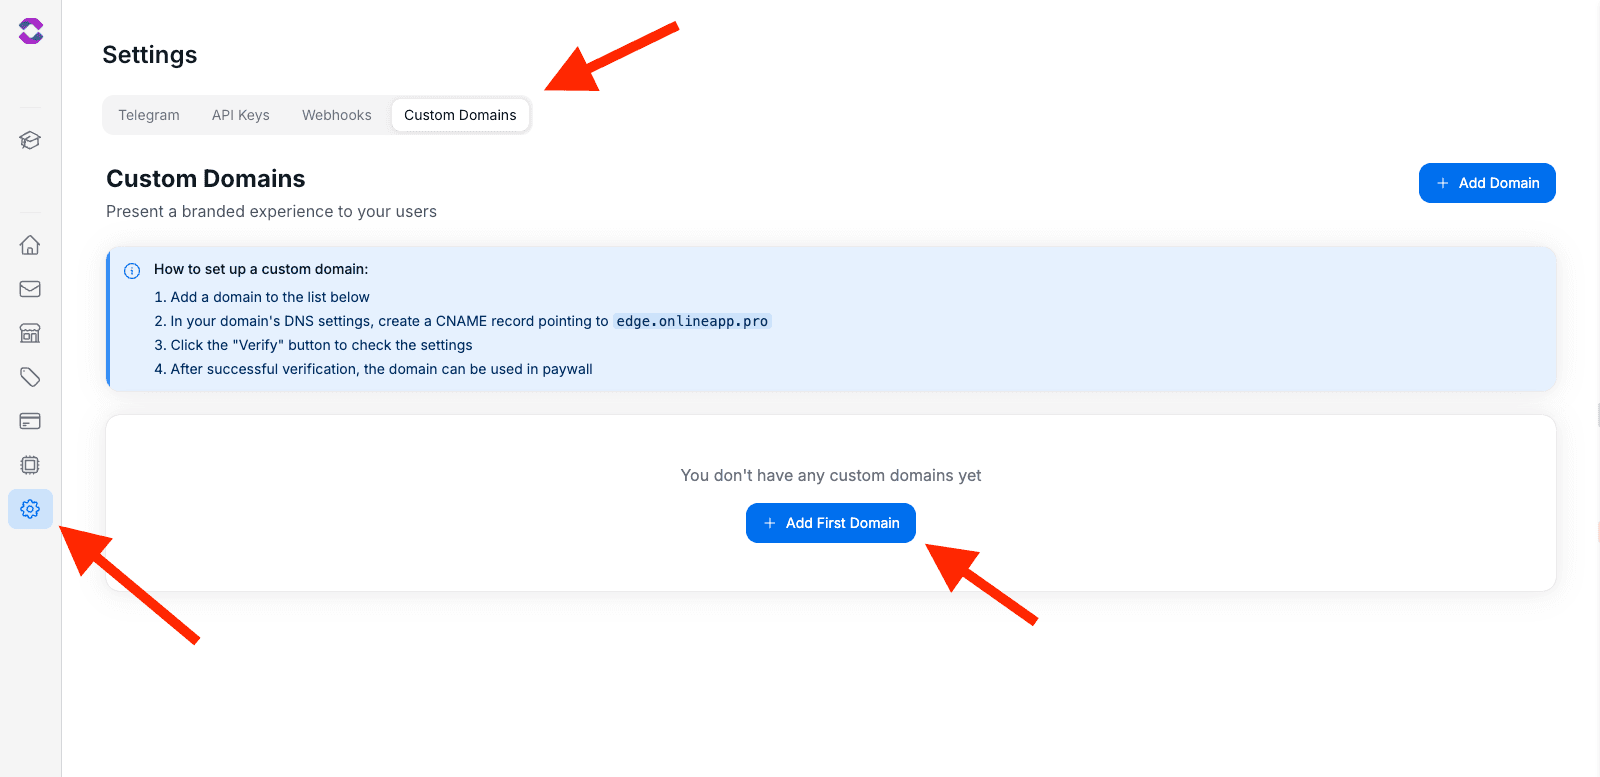
Step 1: Add domain in settings
- Log into your account and go to Settings
- In the left menu, select Custom Domains
- Click the “Add Domain” button
- In the popup window, enter your third-level subdomain:
- ✅ Correct:
app.yoursite.com - ✅ Correct:
platform.yoursite.com - ✅ Correct:
account.yoursite.com - ❌ Incorrect:
yoursite.com(root domain)
- ✅ Correct:
Avoid payment-related subdomains like pay.*, paywall.*, checkout.*, billing.* — they are often blocked by adblockers (uBlock, AdBlock Plus, Brave Shields) and will fail for a share of your users. Prefer neutral names: app.*, platform.*, account.*.
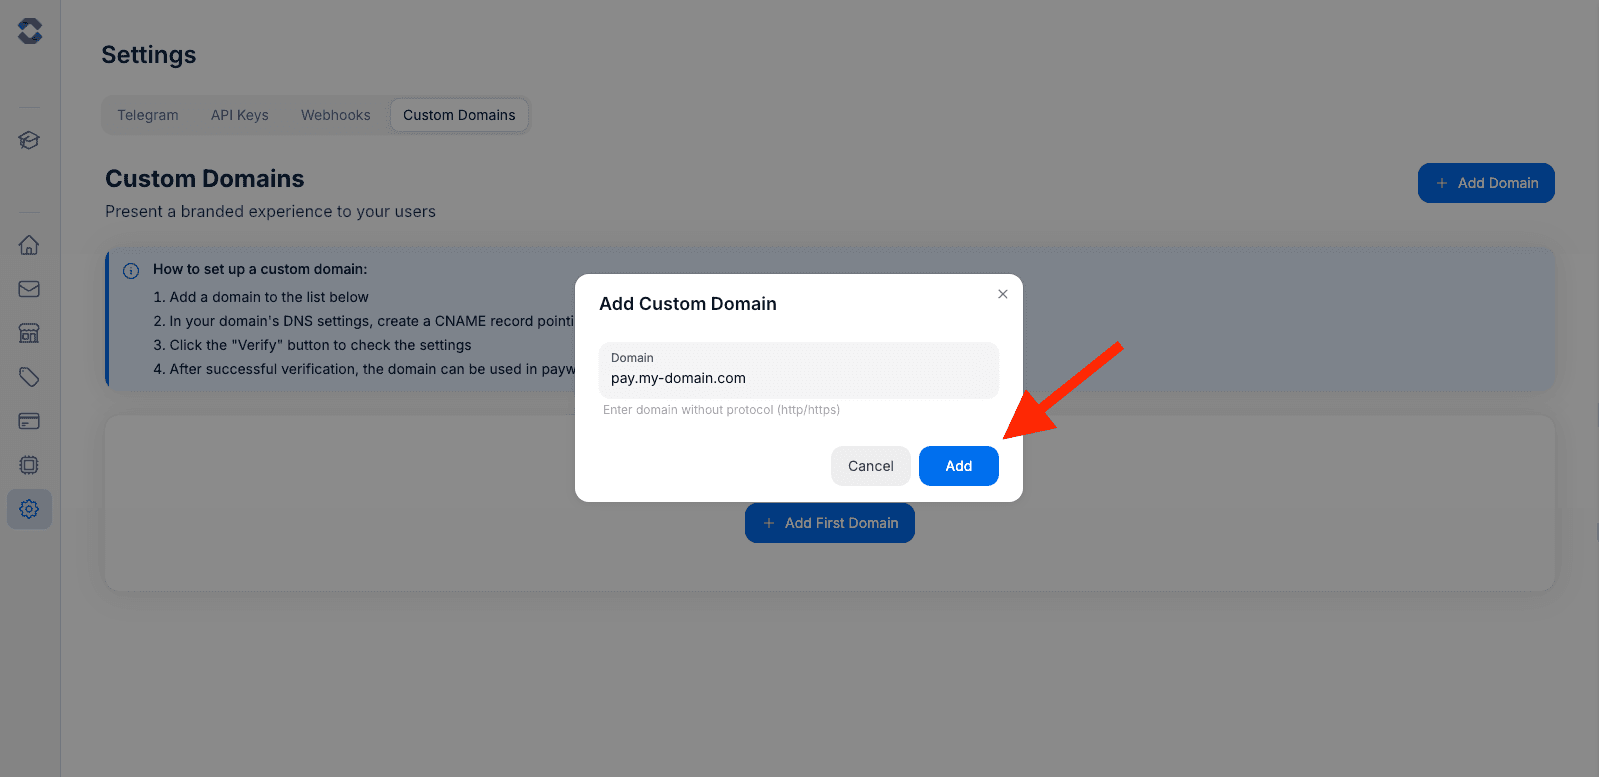
- Click “Add”
After adding, the domain will appear in the list with “Pending” status (awaiting verification).
Step 2: Delegate subdomain via NS records
Now you need to delegate your subdomain to DigitalOcean DNS by creating NS records in your primary DNS. This step is performed in your domain registrar’s or hosting provider’s control panel.
Creating NS records (subdomain delegation)
- Log into your domain’s DNS management panel
- Find the DNS records management section
- Create three NS records for your subdomain (e.g.,
app.yoursite.com):
| Parameter | Value |
|---|---|
| Record Type | NS |
| Name/Host | app.yoursite.com |
| Value/Target | ns1.digitalocean.com |
| Value/Target | ns2.digitalocean.com |
| Value/Target | ns3.digitalocean.com |
| TTL | 300 (or minimum value) |
You do not need to change nameservers for the entire root domain. Only delegate the specific subdomain you plan to use for paywalls.
Examples for popular providers
- Cloudflare: Add NS records for the subdomain in DNS → Records. Cloudflare allows NS records at the subdomain level.
- GoDaddy/Namecheap: Use Advanced DNS to add NS records for the exact subdomain (not root).
⚠️ Important notes
- Ensure you add exactly three NS records: ns1, ns2, ns3.digitalocean.com
- Set minimum TTL for quicker updates
- Some registrars may not support subdomain NS records — check your provider’s documentation
Step 3: Wait for DNS propagation
After creating the NS records, you need to wait for them to propagate:
- Usually: 5-30 minutes
- Maximum: up to 48 hours
Checking NS records
You can verify the correct setup using online tools:
nslookup -type=ns pay.yoursite.com- DNS Checker → NS lookup
- What’s My DNS → NS lookup
The correct result should show all three nameservers:
ns1.digitalocean.com
ns2.digitalocean.com
ns3.digitalocean.com
Step 4: Domain verification in dashboard
After NS records propagation:
- Return to Settings → Custom Domains
- Find your domain in the list
- Click the “Verify” button
If everything is configured correctly, the domain status will change to “Waiting for moderation”. A moderator will review and set it to “Verified”.
How long does moderation take? The NS check itself is instant, but the moderation review is done manually — it usually takes up to 2 business days. You don’t need to click “Verify” again while the domain sits in “Waiting for moderation”; the status updates on its own once the review is done.
Possible errors
”NS lookup failed”
- Check that NS records were created for the correct subdomain
- Wait for full DNS propagation (up to 48 hours)
- Make sure TTL is set to minimum value
”NS records are invalid. Missing: …”
- Ensure all three nameservers are present: ns1, ns2, ns3.digitalocean.com
- Re-check that you created NS (not CNAME/A) records
”Domain already in use”
- This domain has already been added by another user
- Each domain can only belong to one account
Step 5: Link to paywall
After the domain is set to Verified by moderator:
- Go to the settings of the desired paywall
- Open the “Advanced Settings” tab
- In the “Custom Domain” section, select your verified domain
- Click “Save”
Now your paywall will be displayed on the custom domain!
Important: After changing the custom domain, you need to get a new installation script that will include the new domain. Go to your paywall settings and copy the updated installation script to ensure it uses your custom domain.
Testing functionality
After setup, test the paywall functionality:
- Open your website
- Try to open the paywall
- Make sure your custom domain appears in the address bar
- Check that authentication and payment work correctly
Troubleshooting
Paywall doesn’t open
- Check domain status (should be “Verified”)
- Make sure the domain is linked to the paywall
- Clear browser cache
- Try opening in incognito mode
Authentication issues
- Make sure you’re using a subdomain of your main site
- Check browser cookie settings
DNS issues
- Ensure all three NS records exist for your subdomain
- Verify that your registrar supports subdomain NS delegation
- Check that TTL is low and enough time has passed for propagation
🎉 Congratulations! Your custom domain is configured and ready to use. Now your users will see your domain during payment, which will increase trust and improve conversion rates.