Create Offer
Step-by-step guide to create discount offers for your paywalls.
Before creating an offer, make sure you understand the overview of how offers work and their benefits.
Step-by-Step Guide
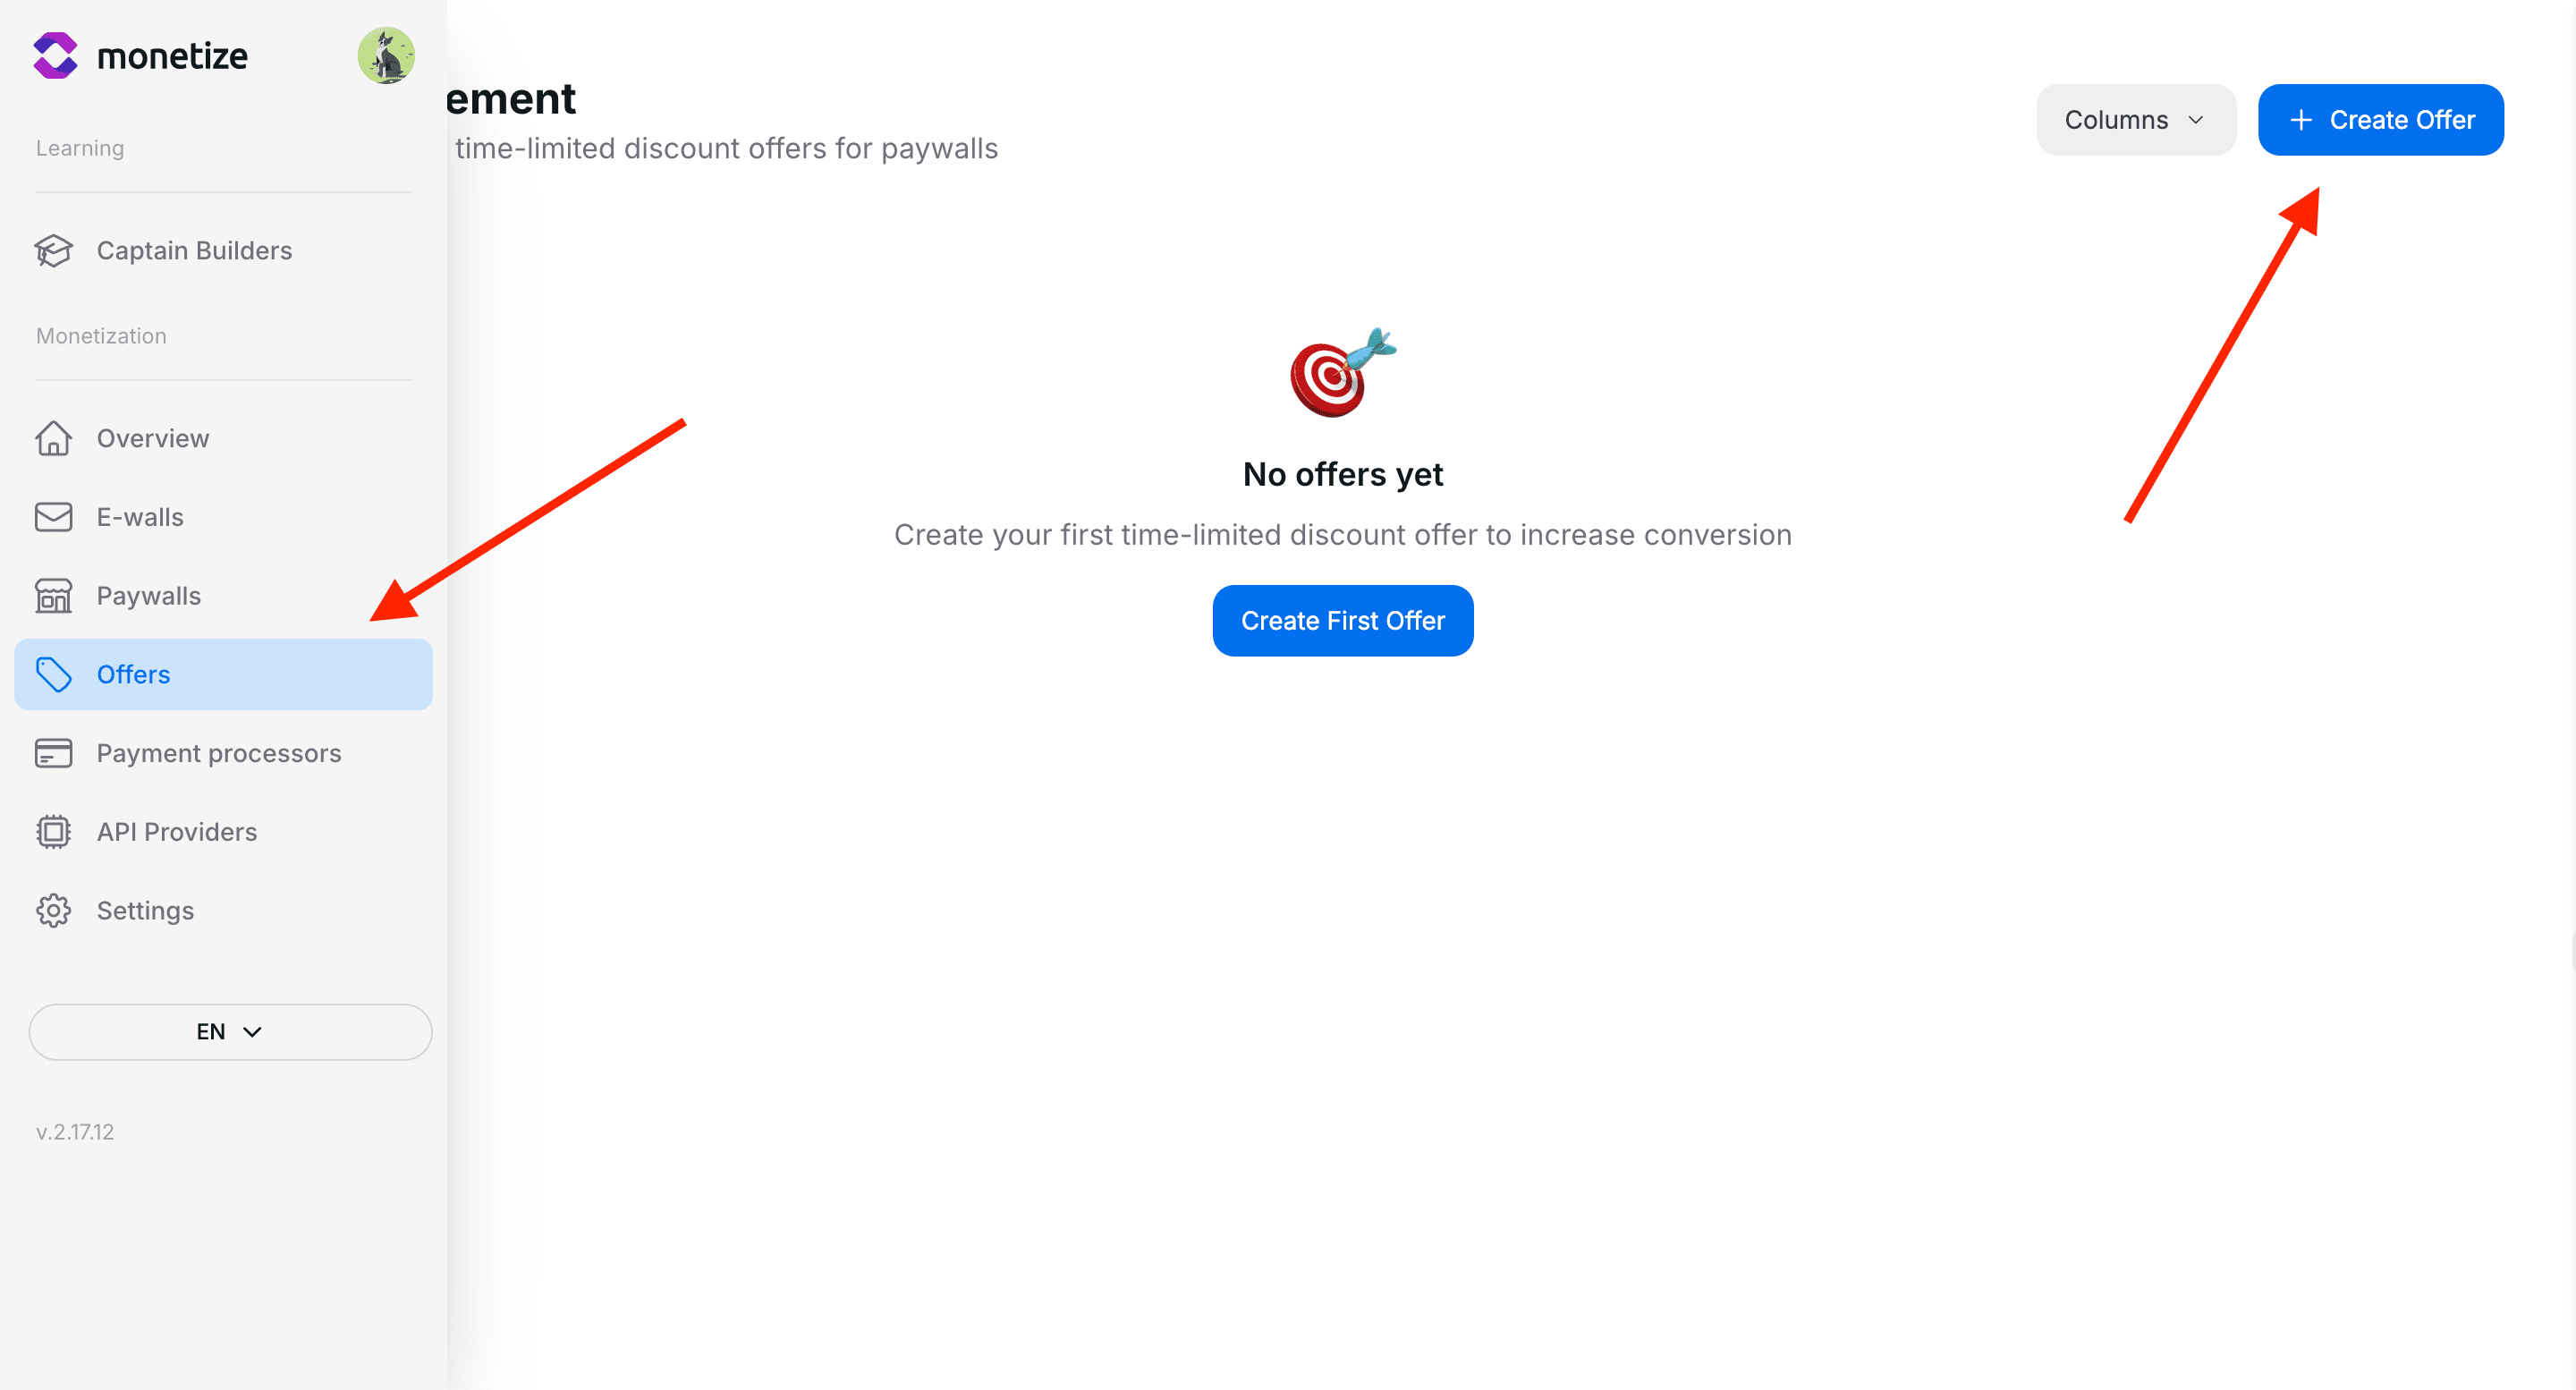
Access Offer Creation
Navigate to your dashboard and go to the Offers section, then click “Create Offer”.
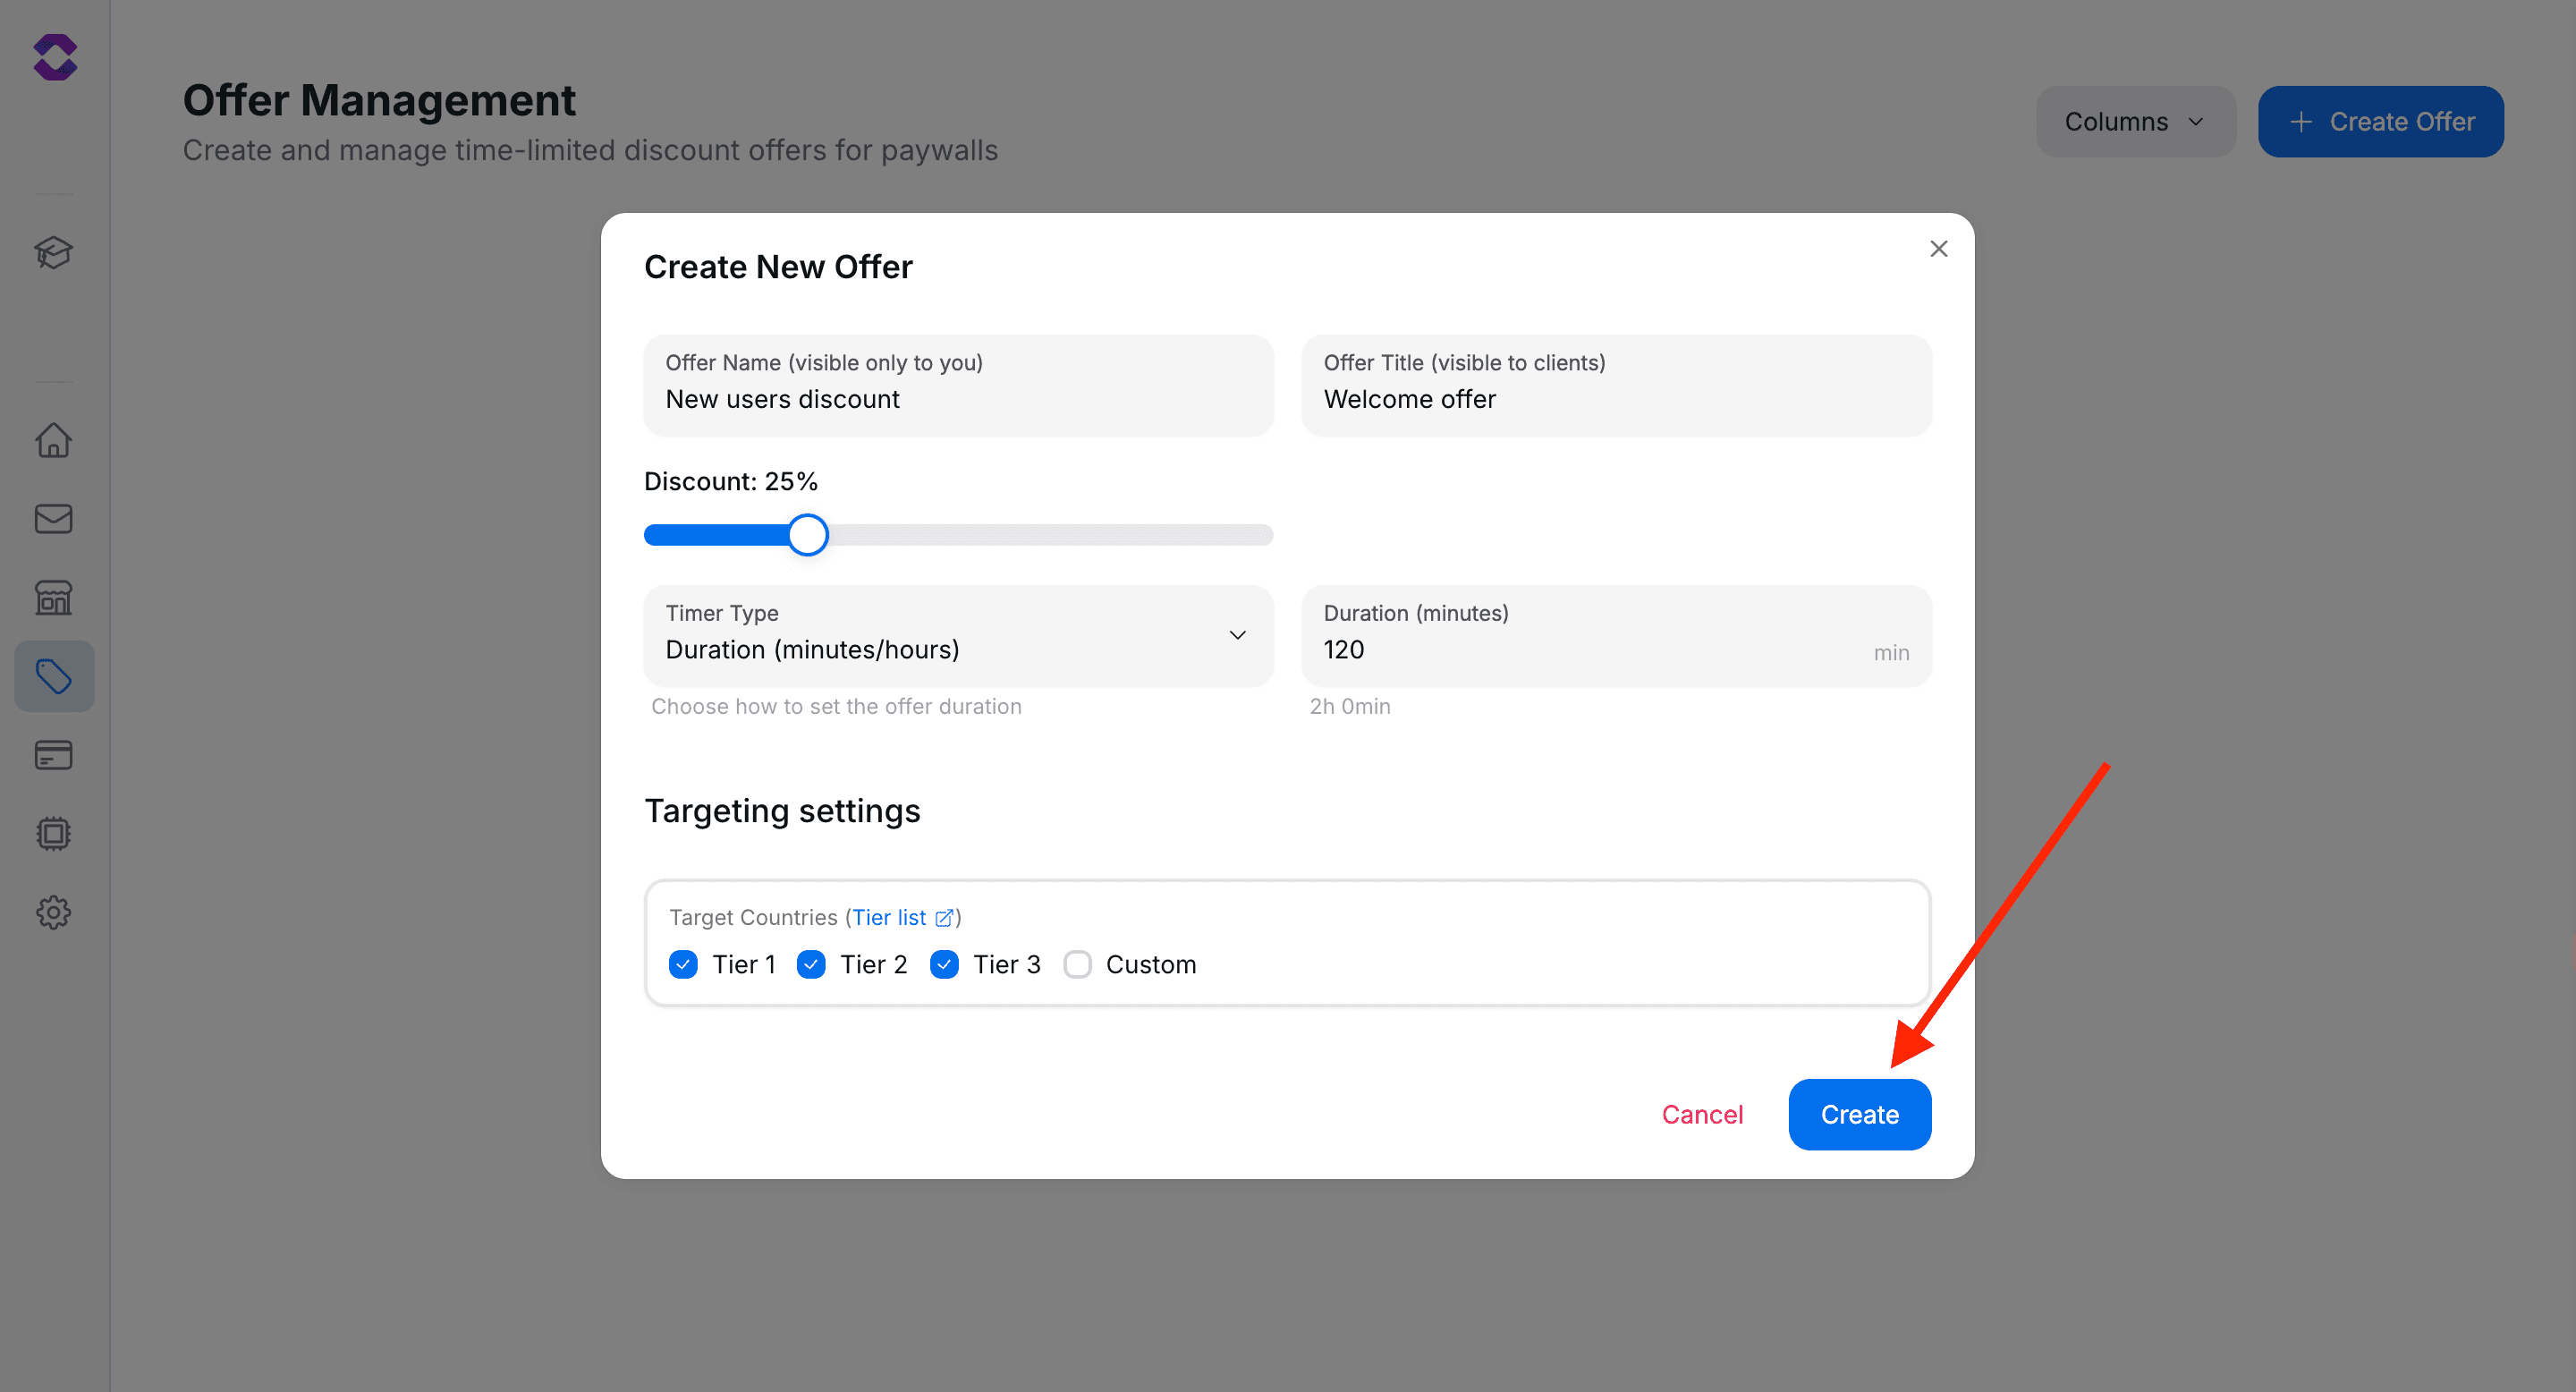
Configure Basic Settings
Set up the fundamental offer parameters:
- Offer Name: Internal name for your reference (not visible to users)
- Offer Title: Public title displayed to users
- Discount Percentage: The discount amount (1-100%)
Set Timer Configuration
Choose how long your offer will be active:
Duration Timer
- Set specific duration in minutes
- Offer expires after the set time from when user first sees it
- Range: 1 minute to 7 days (10,080 minutes)
Configure Targeting
Target specific audiences for your offer:
Geographic Targeting
- Tier 1 Countries: US, UK, Canada, Australia, etc.
- Tier 2 Countries: European countries, Japan, etc.
- Tier 3 Countries: Other countries
- Custom Countries: Manually select specific countries
Save Your Offer
Click “Create” to save your offer. It will be available for connecting to paywalls.
Configuration Tips
Choosing Discount Percentages
Select appropriate discount levels based on your use case:
- 10-20% - First-time user incentives, low barrier entry
- 25-35% - Standard promotions, win-back campaigns
- 40-50% - Flash sales, high urgency situations
- 50%+ - Special events, clearance sales
Timer Best Practices
- 5-15 minutes - Impulse buying, immediate action
- 1-4 hours - Consideration time for bigger purchases
- 24-48 hours - Weekend sales, event-based offers
- 3-7 days - Seasonal campaigns, product launches
Geographic Targeting Strategy
- Tier 1 countries - Lower discounts (10-25%), focus on margins
- Tier 2 countries - Moderate discounts (20-35%)
- Tier 3 countries - Higher discounts (30-50%), focus on volume
- Custom selection - Target specific markets for regional campaigns
Next Steps
After creating your offer: