Creating Paywall
Step-by-step guide to creating and configuring a paywall to monetize your application.
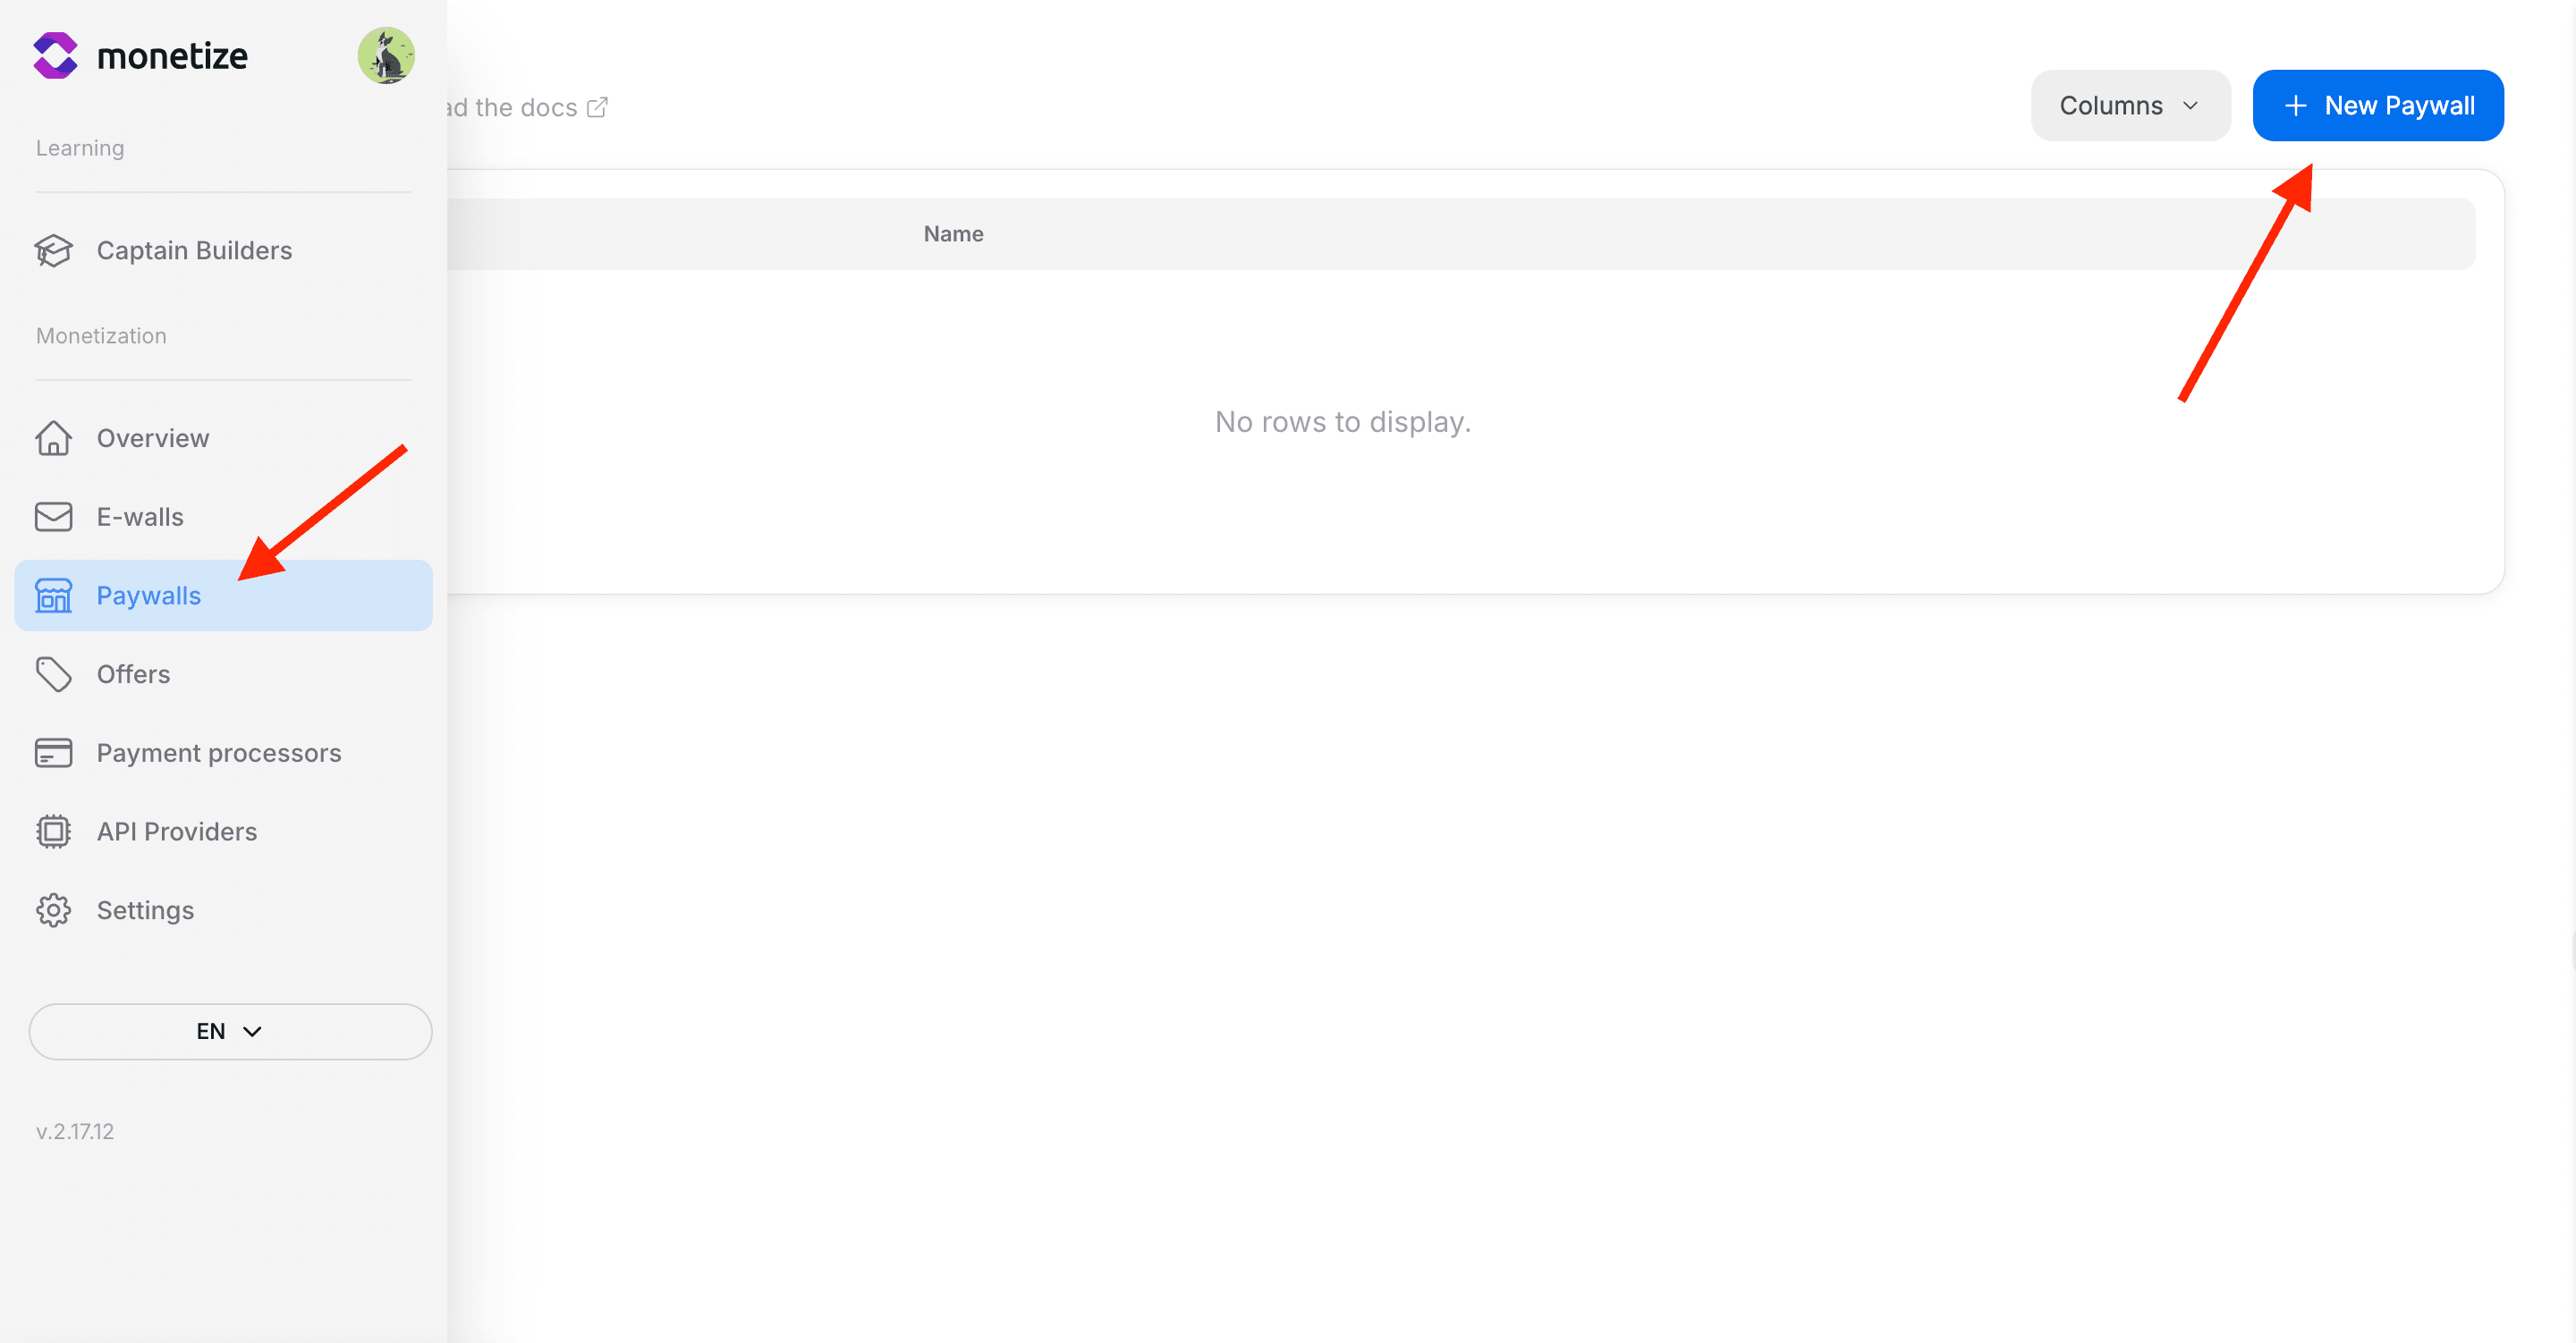
Step 1: Create New Paywall
Navigate to Paywalls and click the “New Paywall” button.
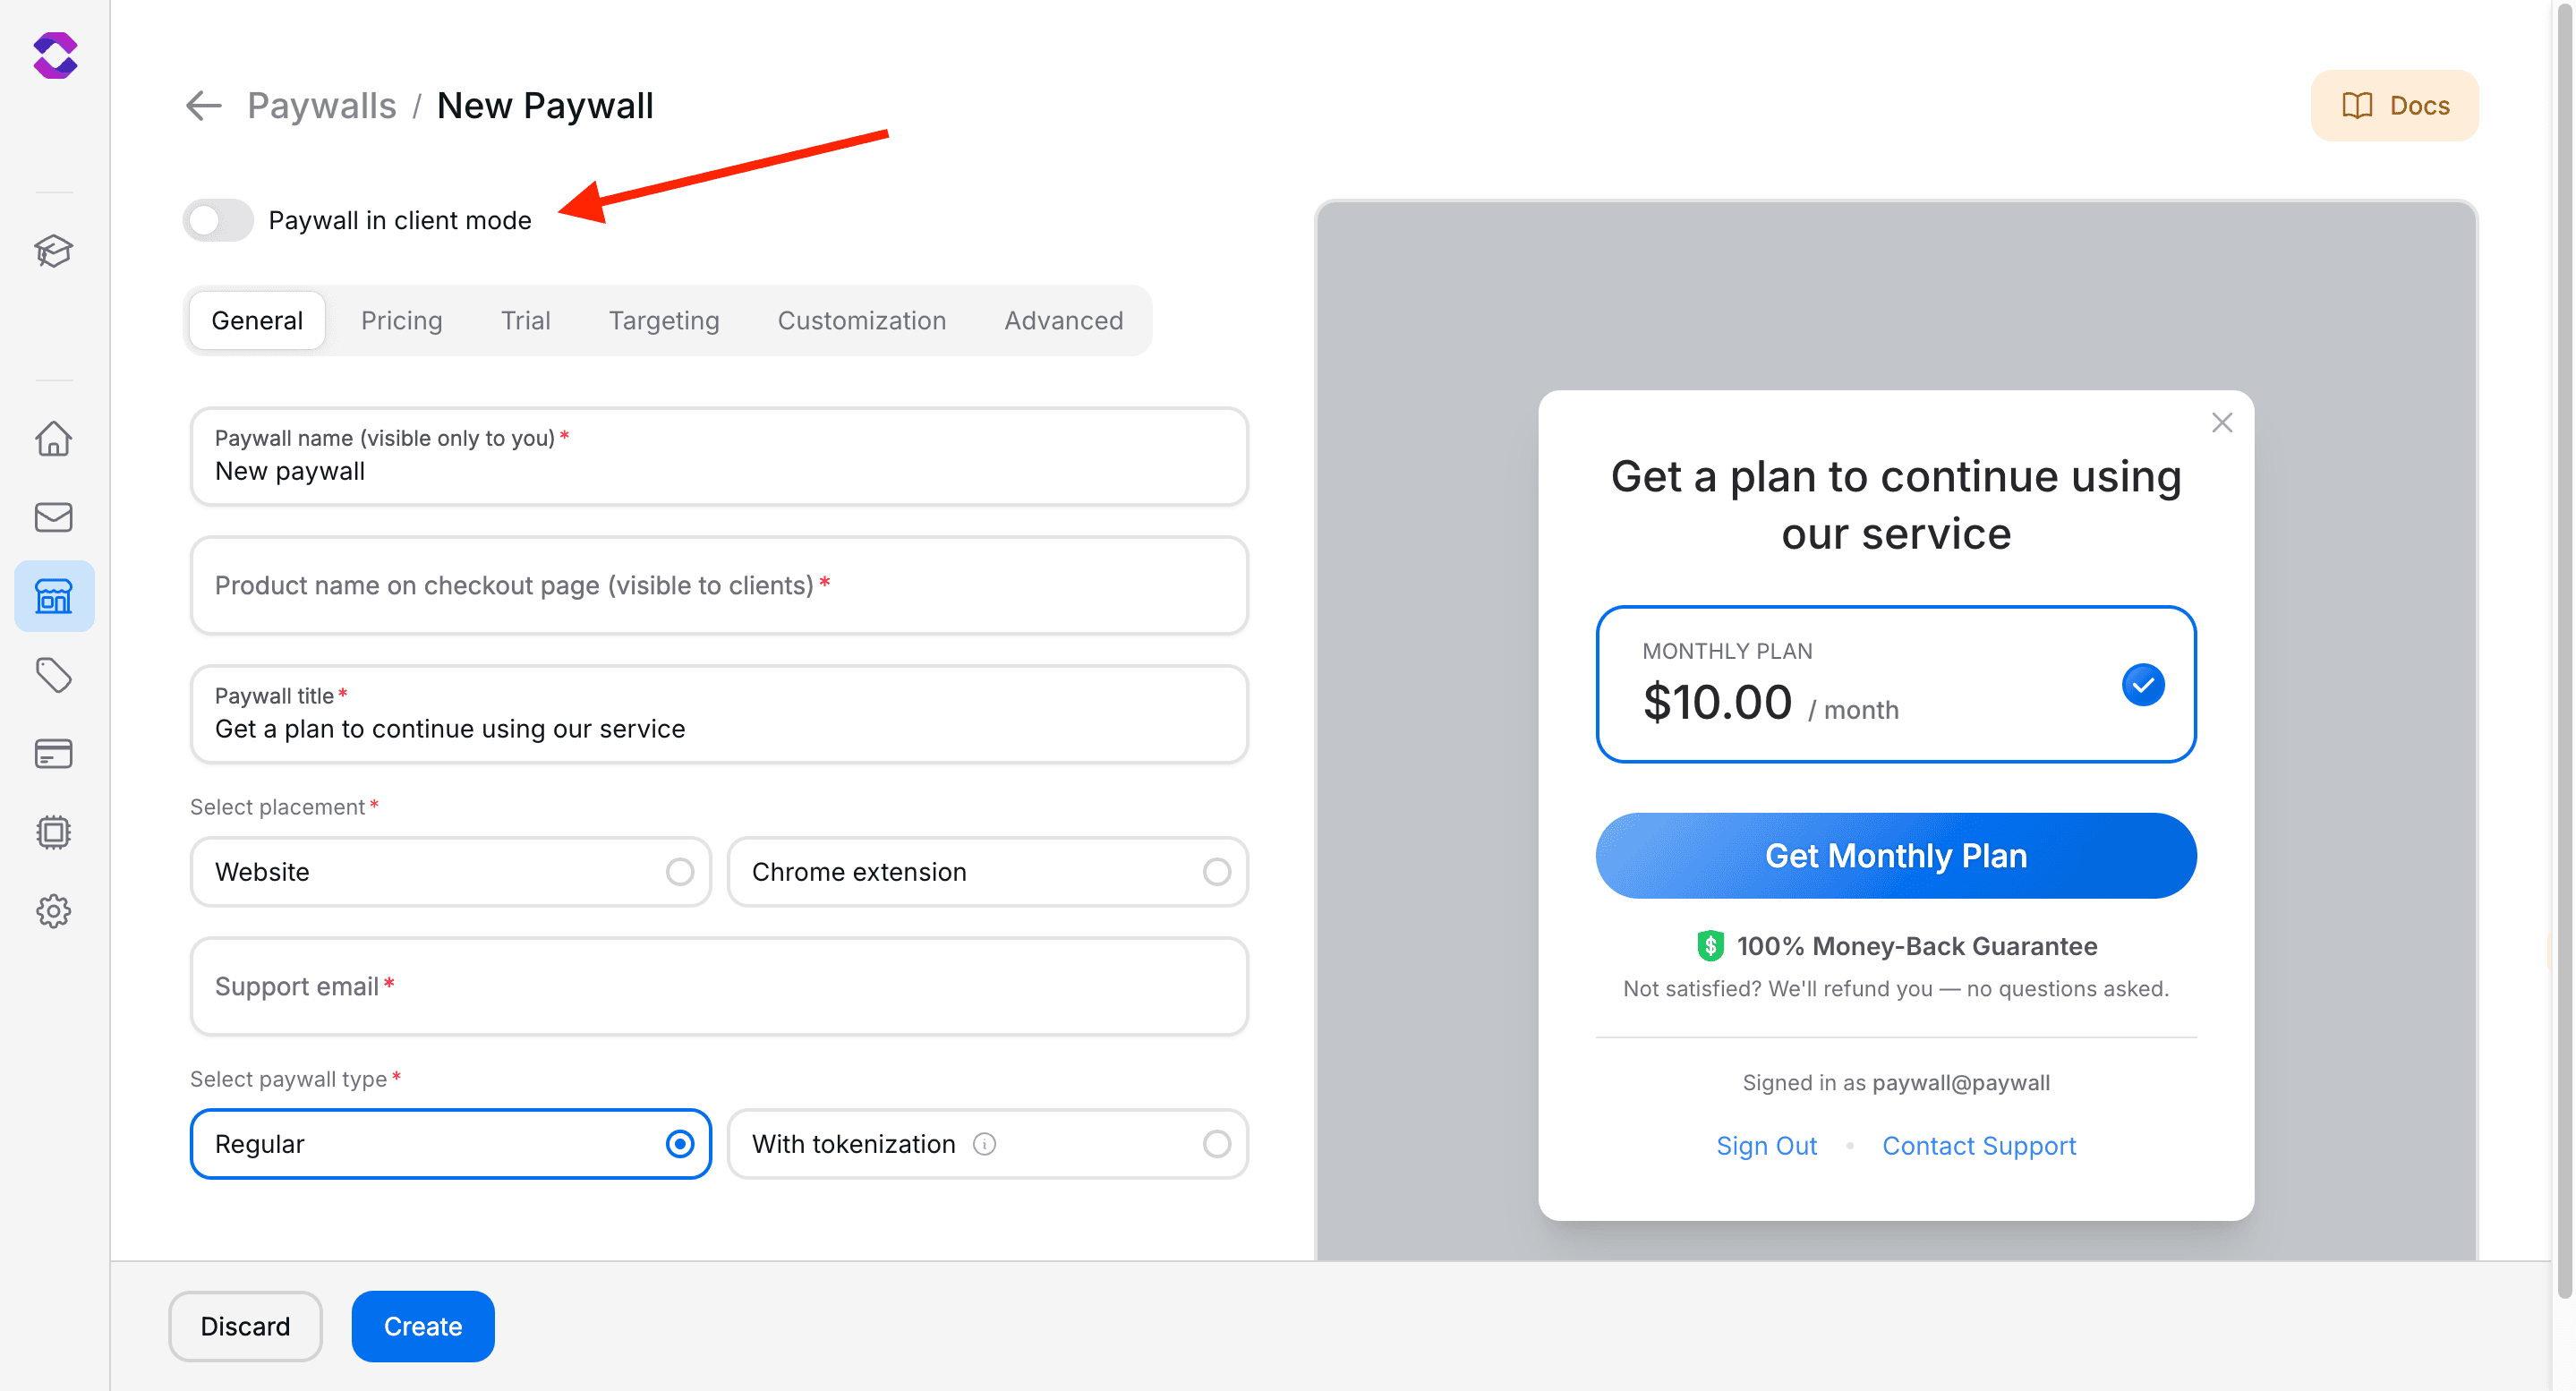
Step 2: Choose Operating Mode
Select one of two operating modes based on your integration needs:
undefined
Client Mode (Recommended for Quick Start)
Your application works through our Client SDK to get ready-made paywalls with our design system that you can customize in the dashboard.
How it works:
- Client SDK handles all paywall logic
- Ready-made UI components with customizable design
- User authentication handled on our side
- Minimal integration effort required
Best for:
- Quick implementation
- Standard use cases
- Teams wanting ready-made solutions
- Projects with limited frontend resources
What you get:
- Pre-built paywall components
- Customizable themes and colors
- Built-in user management
- Real-time preview in dashboard
Choose Client Mode if you want to get started quickly with minimal development effort. Choose Server Mode if you need complete control over the user experience and have development resources to build custom interfaces.
Step 3: Basic Settings
Fill in the basic paywall information:
| Setting | Description |
|---|---|
| Paywall name | Internal name for management |
| Product name on checkout page | Product name displayed to users on checkout page |
| Paywall title (only client mode) | Title displayed to users in paywall |
| Support email (only client mode) | Contact email for users |
| Paywall type (only client mode) | Select “With tokenization” to limit the number of actions a user can take, requiring them to purchase the plan again if they run out of actions. Before you do this, add the server endpoint whose actions you want to tokenize to API Providers. Read more. |
| Placement (only client mode) | Choose where your paywall operates: Website Mode works anywhere on the web, including within browser extensions. Chrome Extension Mode requires an extension ID and uses Chrome storage instead of cookies for session management. |
For Chrome Extensions: Always use Chrome Extension Mode when integrating paywalls into browser extensions. This mode provides more reliable session management using Chrome storage instead of cookies, which is essential for extensions that may operate across different domains.
Step 4: Pricing Configuration
Add subscription plans with different periods and prices:
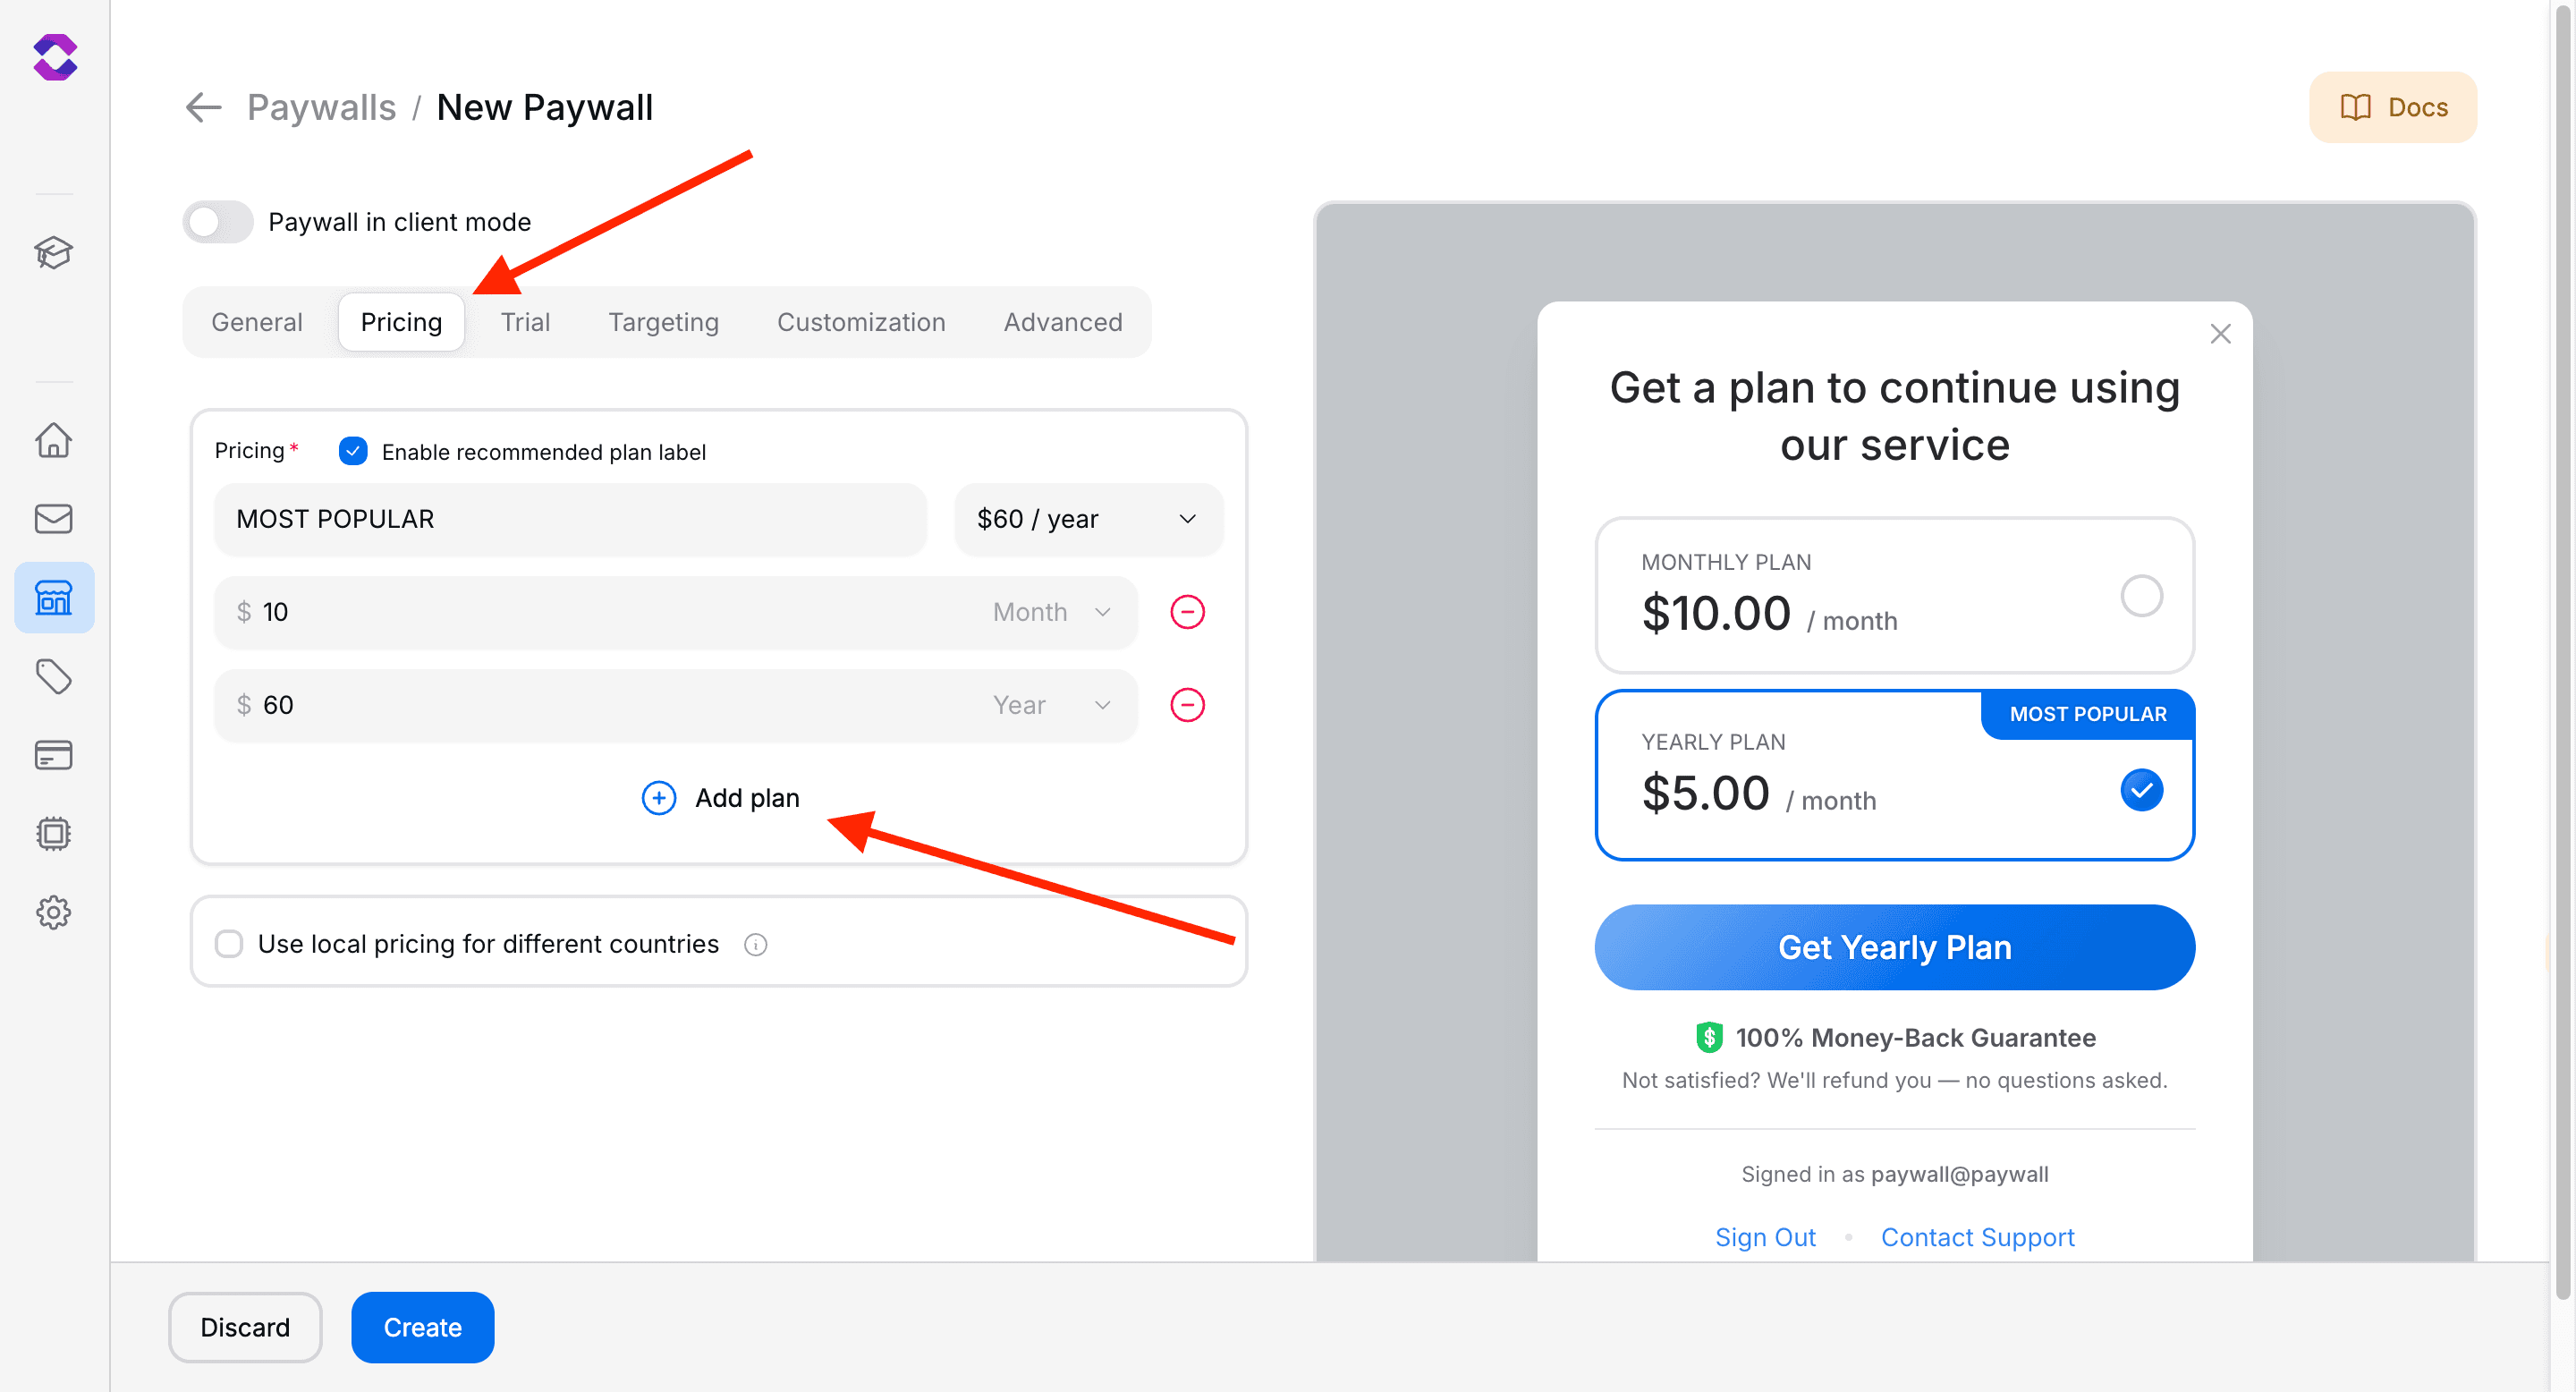
- Add Plan: Click “Add Plan”
- Set Price: Specify cost
- Choose Period: week, month, year, lifetime
- Sorting: Plans are automatically sorted by price
- (Optional) Set Recommended plan: This plan will display a label next to its price and be selected by default
Step 5: Additional Settings (Client Mode)
If Client Mode is selected, configure additional parameters to customize your paywall behavior and appearance:
(Optional) Trial Settings
Configure trial periods to give users a taste of your service before requiring payment.
Trial before paywall opened:
- No trial: Paywall appears immediately when triggered
- Trial time: Set hours before paywall appears (e.g., 24 hours after app installation)
- Trial actions: Set number of free actions before paywall appears (e.g., 5 free uses)
Trial after paywall opened:
- Free trial duration (days): Number of days users can access your service for free after providing payment details (0-365 days)
Trial settings help improve user experience by allowing users to experience value before being asked to pay. Time-based trials work well for daily-use apps, while action-based trials are perfect for utility tools.
(Optional) Targeting
Control where and to whom your paywall is displayed for optimal conversion rates.
Geographic Targeting:
- Countries where paywall is active: Select specific countries to show the paywall. Useful for region-specific launches or compliance requirements.
Device Targeting:
- Show paywall to macOS users: Display paywall to macOS users regardless of their country settings.
Pro Tip: Enabling macOS targeting often increases revenue by 15-25% as macOS users generally have higher conversion rates and spending power.
(Optional) Customization
Customize the visual appearance and behavior of your paywall to match your brand.
Visual Customization:
- Brand Color: Set your primary brand color using hex values (e.g., #3B82F6). Includes a color picker for easy selection.
- Pricing View: Choose between vertical (default) or horizontal layout for pricing plans
- Features View: Select between default features display or create custom feature lists
Behavior Settings:
- Allow Close: Enable/disable the ability for users to close the paywall without making a purchase. User can continue using free features.
Custom Features List (when Custom Features View is selected):
- Add up to 5 custom features with names and descriptions
- Perfect for highlighting specific benefits of your paid plans
- Each feature can have a descriptive subtitle for clarity
Custom CSS styles:
- Add custom CSS code to fully personalize your paywall’s appearance beyond basic color settings
- Maximum size limit: 5KB to ensure fast loading times
- Available CSS selectors for targeting specific elements:
#overlay- Background overlay behind the paywall modal#modal- Main paywall container/modal window#close-button- Close button (if enabled)#title- Paywall title text#subscription-trial-days- Trial period badge/indicator#pricing-wrapper- Container for pricing plans
- Security restrictions: JavaScript, external imports (@import), and unsafe constructs are blocked for security
- Perfect for advanced branding: gradients, shadows, custom fonts, animations, and unique layouts
(Optional) Advanced Settings
Configure advanced behavioral settings for enhanced user experience.
Checkout Customization:
- Shop URL on checkout page: Set the URL users return to when clicking “back to shop” on checkout page. Without this, the checkout page simply closes.
- Success redirect URL: Define where users are redirected after successful payment completion
Tokenized Paywalls (when tokenization is enabled):
- Sign in title: Customize the sign-in prompt title for returning users of tokenized paywalls
- Default: “Please sign in to continue using our service”
Important: Success redirect URLs should be HTTPS and belong to your domain for security reasons.
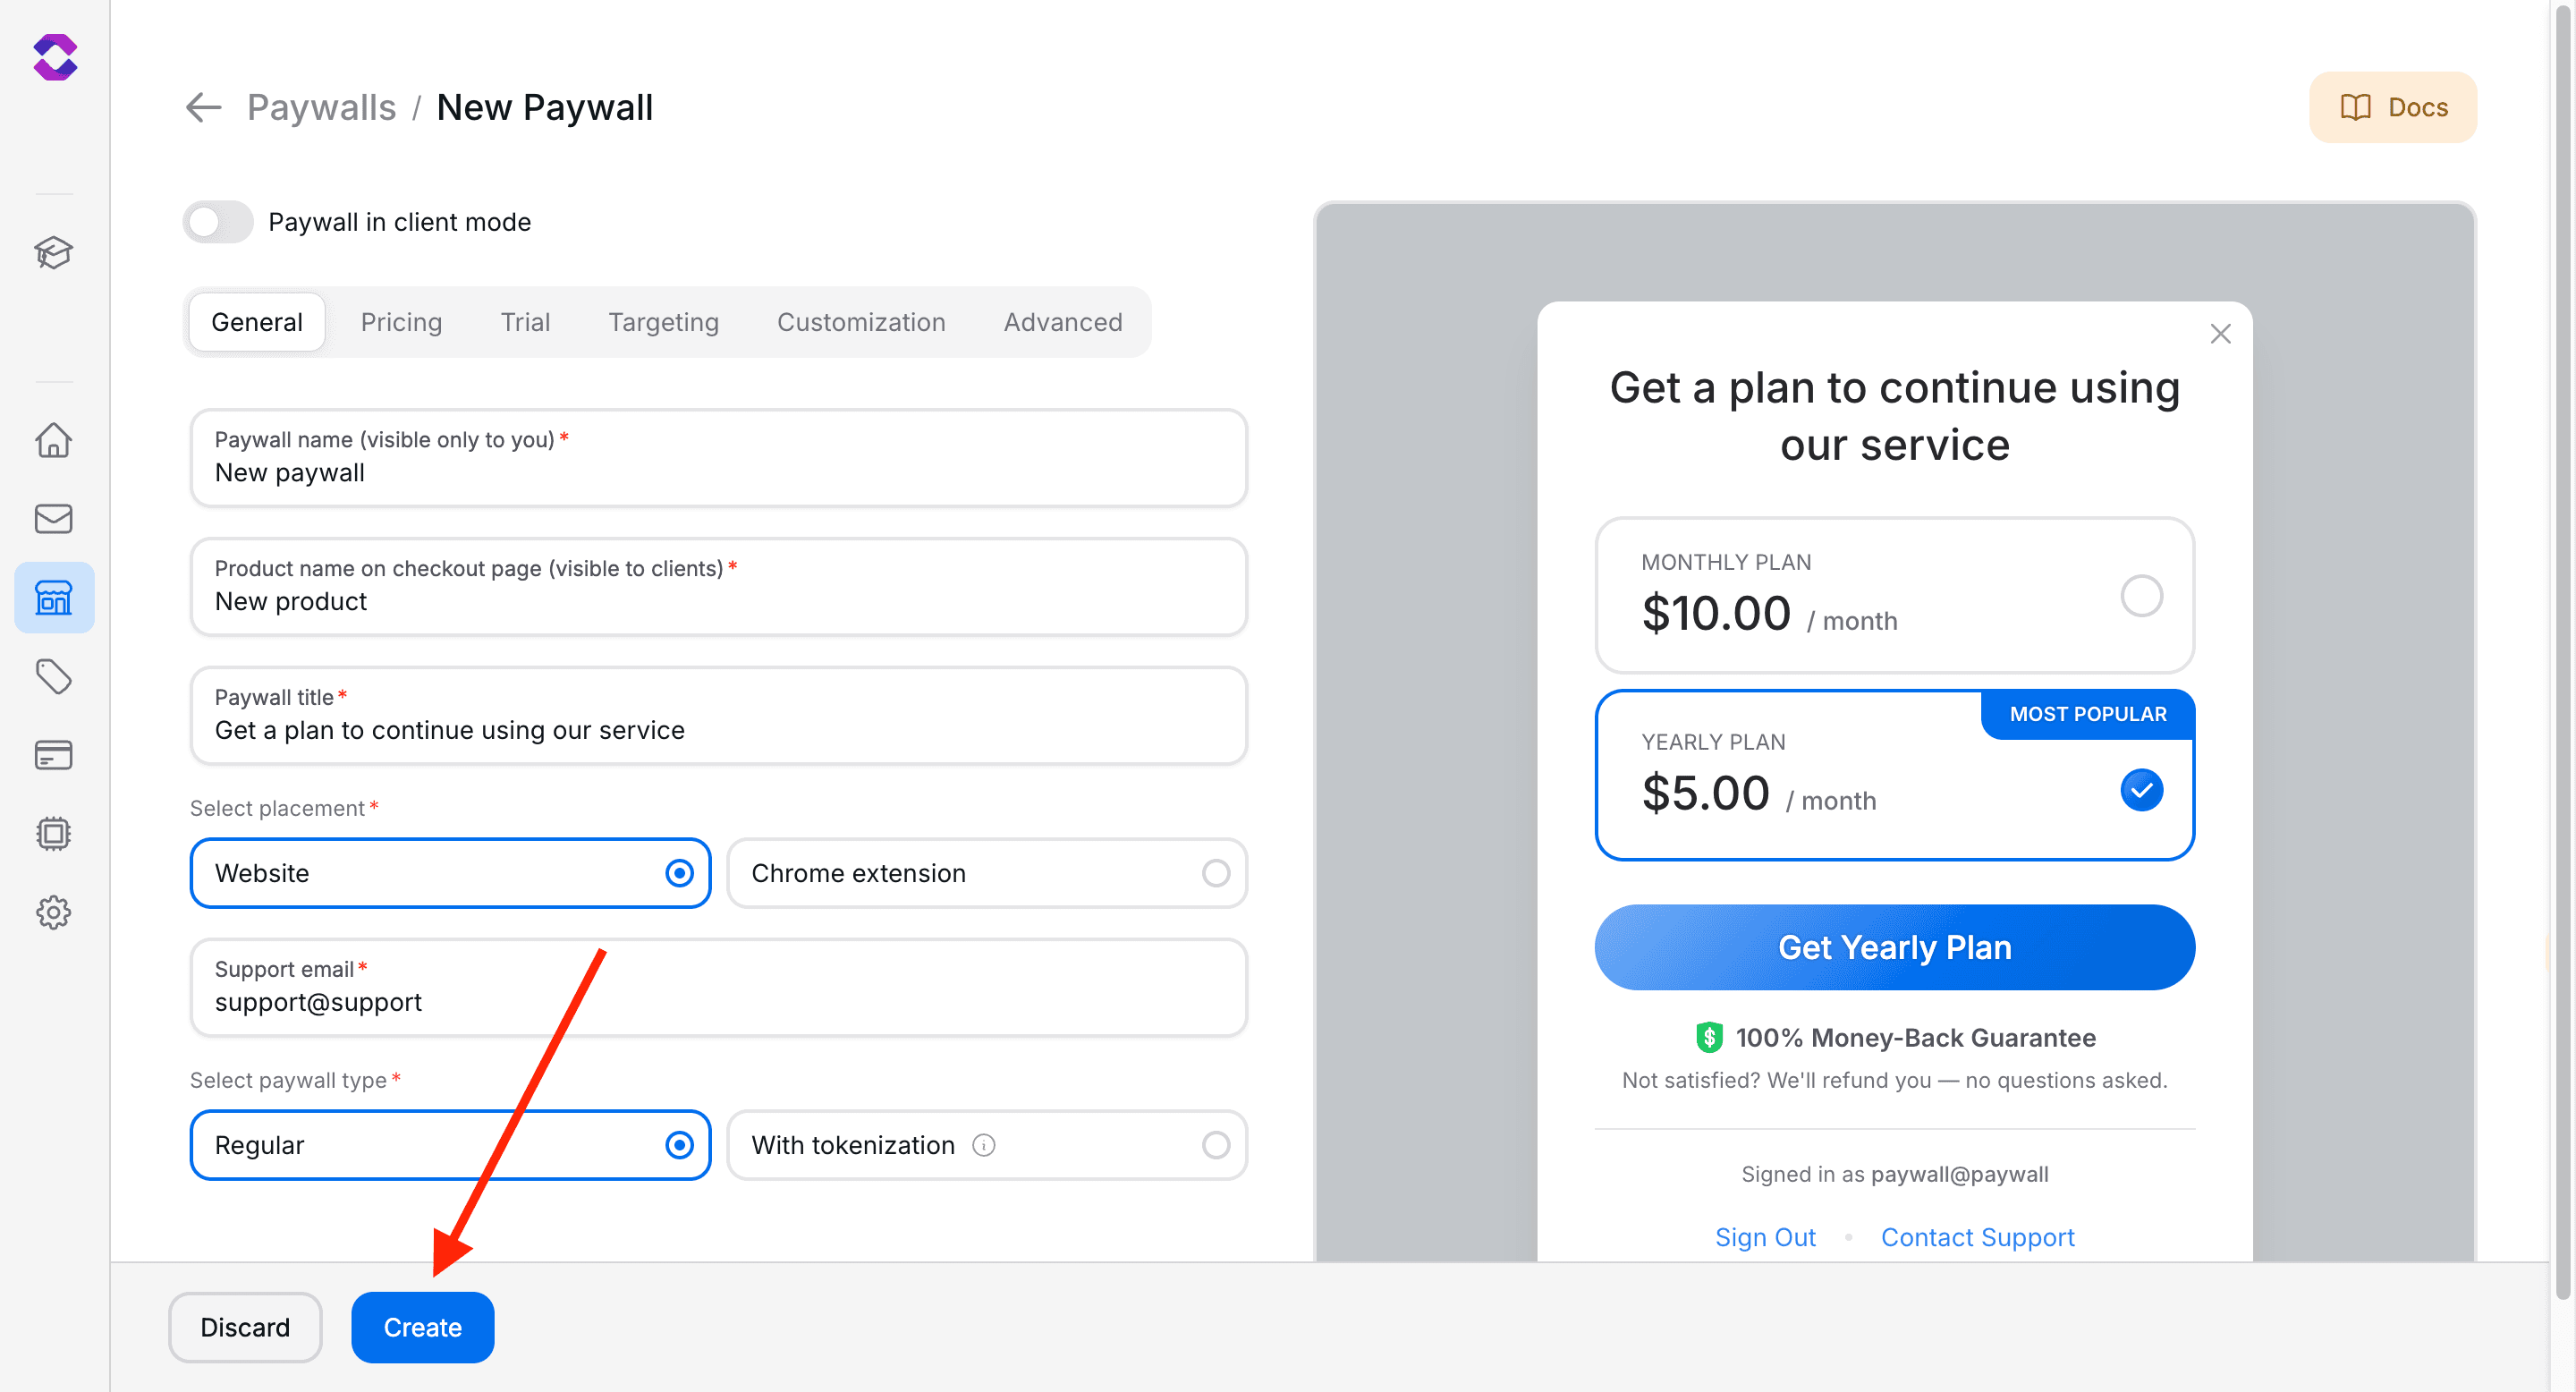
Step 6: Create
After configuring all parameters, click the “Create Paywall” button to create your paywall.
Next Steps
After creating paywall, you can:
Best Practices
- Test Thoroughly: Always test paywall before switching to Live mode
- Monitor Conversions: Use built-in analytics for optimization
- Localization: Configure local prices for different regions